
Shopify + Product Sync
Learn how to hook up Shopify and ConversionFly
In Shopify, setting up a webhook is super simple!
Follow the steps below.
NOTE: If you were using our Legacy Product Management and switching over to webhooks, you’ll need to make sure you remove ALL products and goal pages before the webhook/HTTP Post option becomes available.
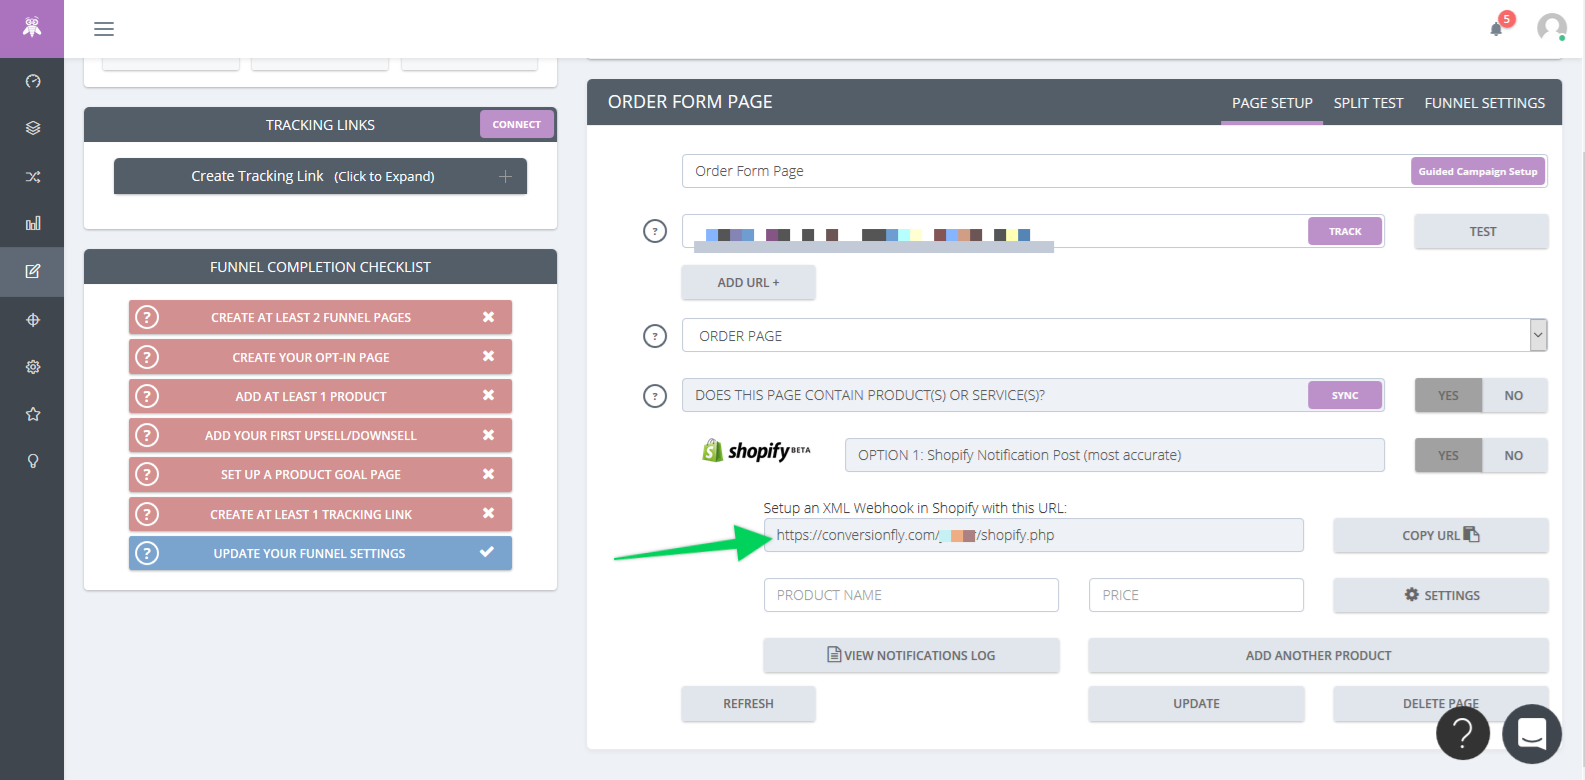
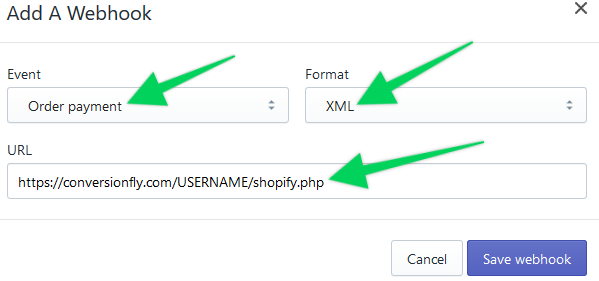
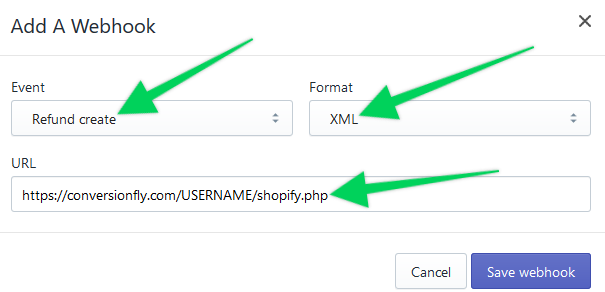
Step 1: Make sure you copy and paste your webhook URL by clicking on the COPY TO CLIPBOARD on ConversionFly.
To save you a little time you can also Copy and Paste it from here:
https://conversionfly.com/USERNAME/shopify.php
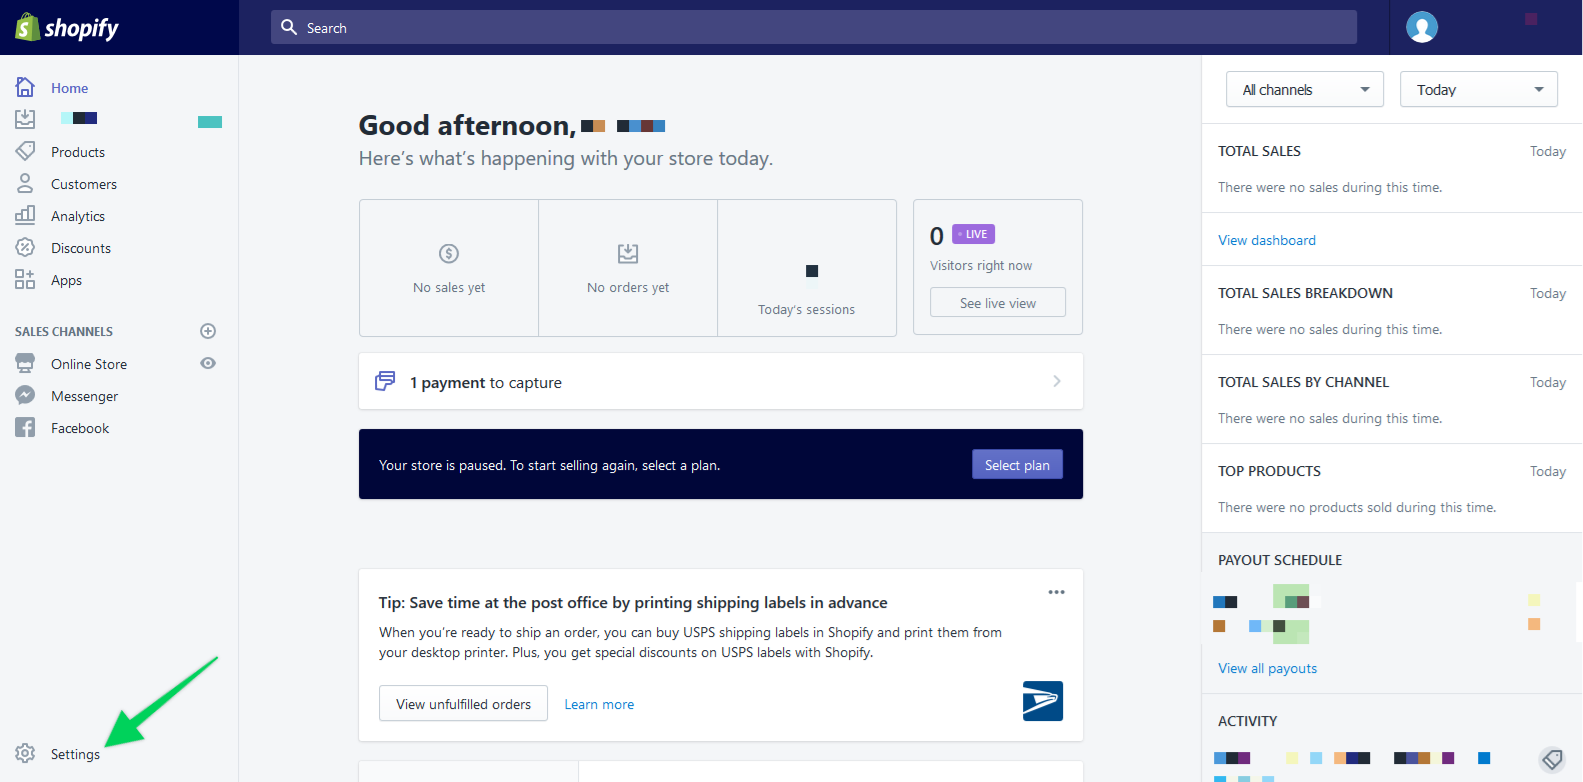
Step 2: Once logged into your Shopify Dashboard go to Settings.
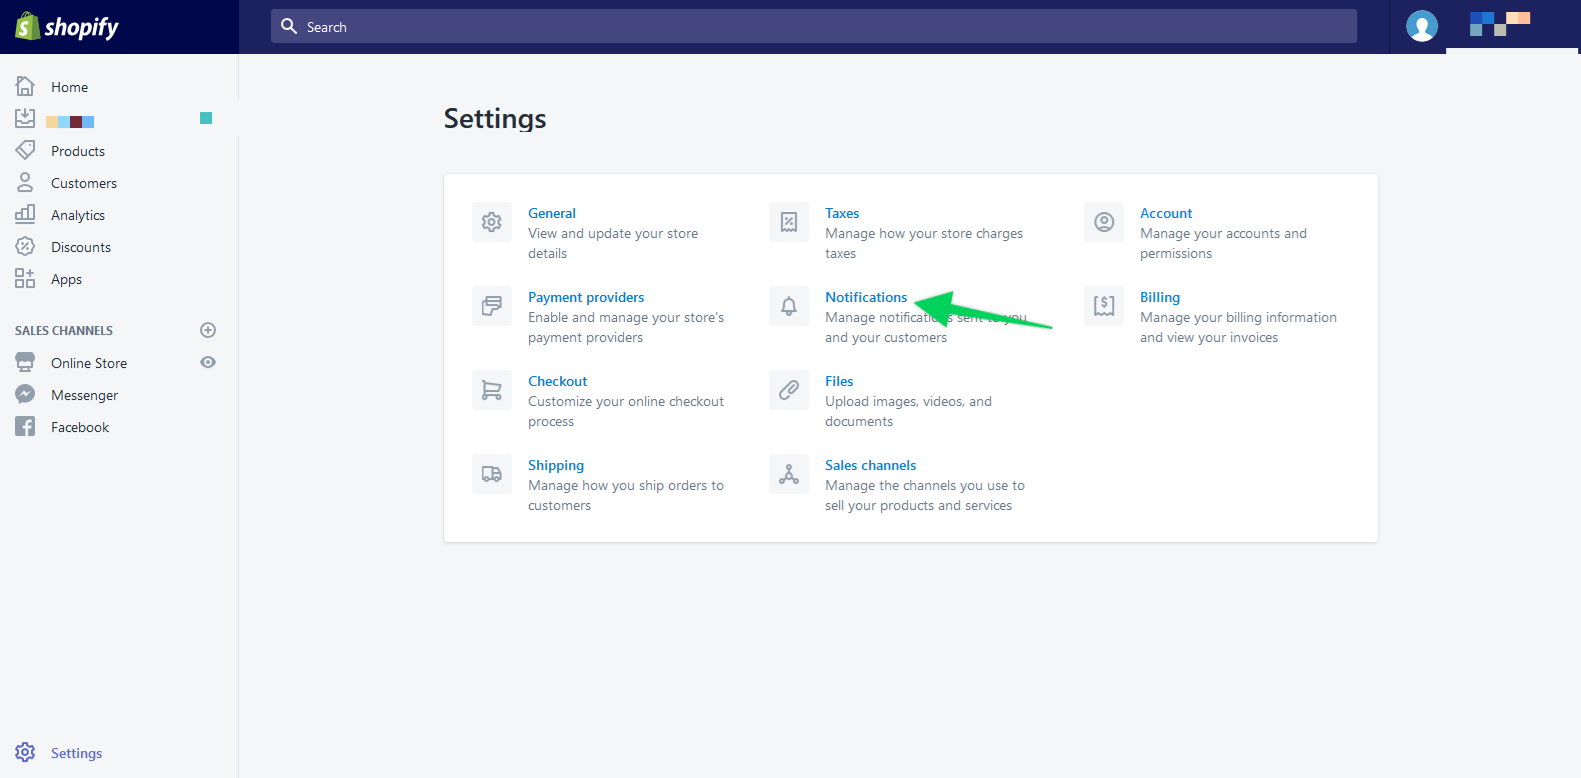
Step 3: Click on Notifications.
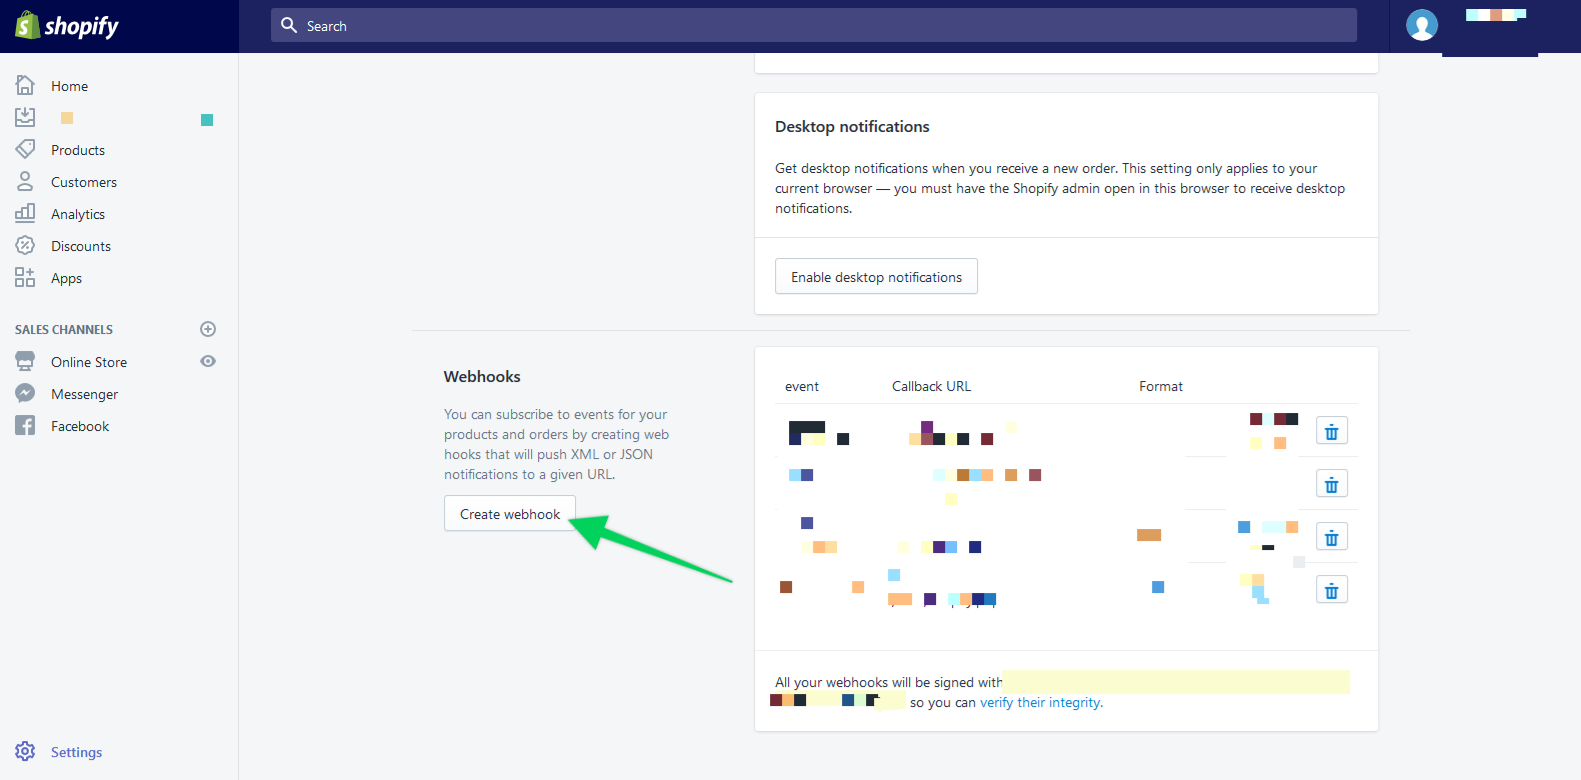
Step 4: Scroll down to the webhook section (bottom of page). Click on “Create webhook”
Step 5: For Event select Order Payment.
Step 6: For Format select XML.
Step 7: Then Paste the URL you previously copied into the URL field and click Save webhook.
Step 7: Repeat this process to add an additional webhook for the Event “refund.created” using the same information for the other fields.
That’s it!
***IMPORTANT: If you have quotes (“) OR apostrophes (‘) in your product name you will need to save them with the ASCII characterization version of those delimiters. As a working example if your product name is Widget “Number One” you’d save your product as Widget "Number One" and for apostrophes Widget ‘Number Two’ would be Widget 'Number Two'
In short, replace any apostrophes with ' and any quotes with " in your product descriptions. Also please keep in mind that PIPE (|) character strings are not allowed in the Product Name field to properly work with our webhooks.
Did this answer your question?